
When I look at my images I see things very differently from the way you see them.
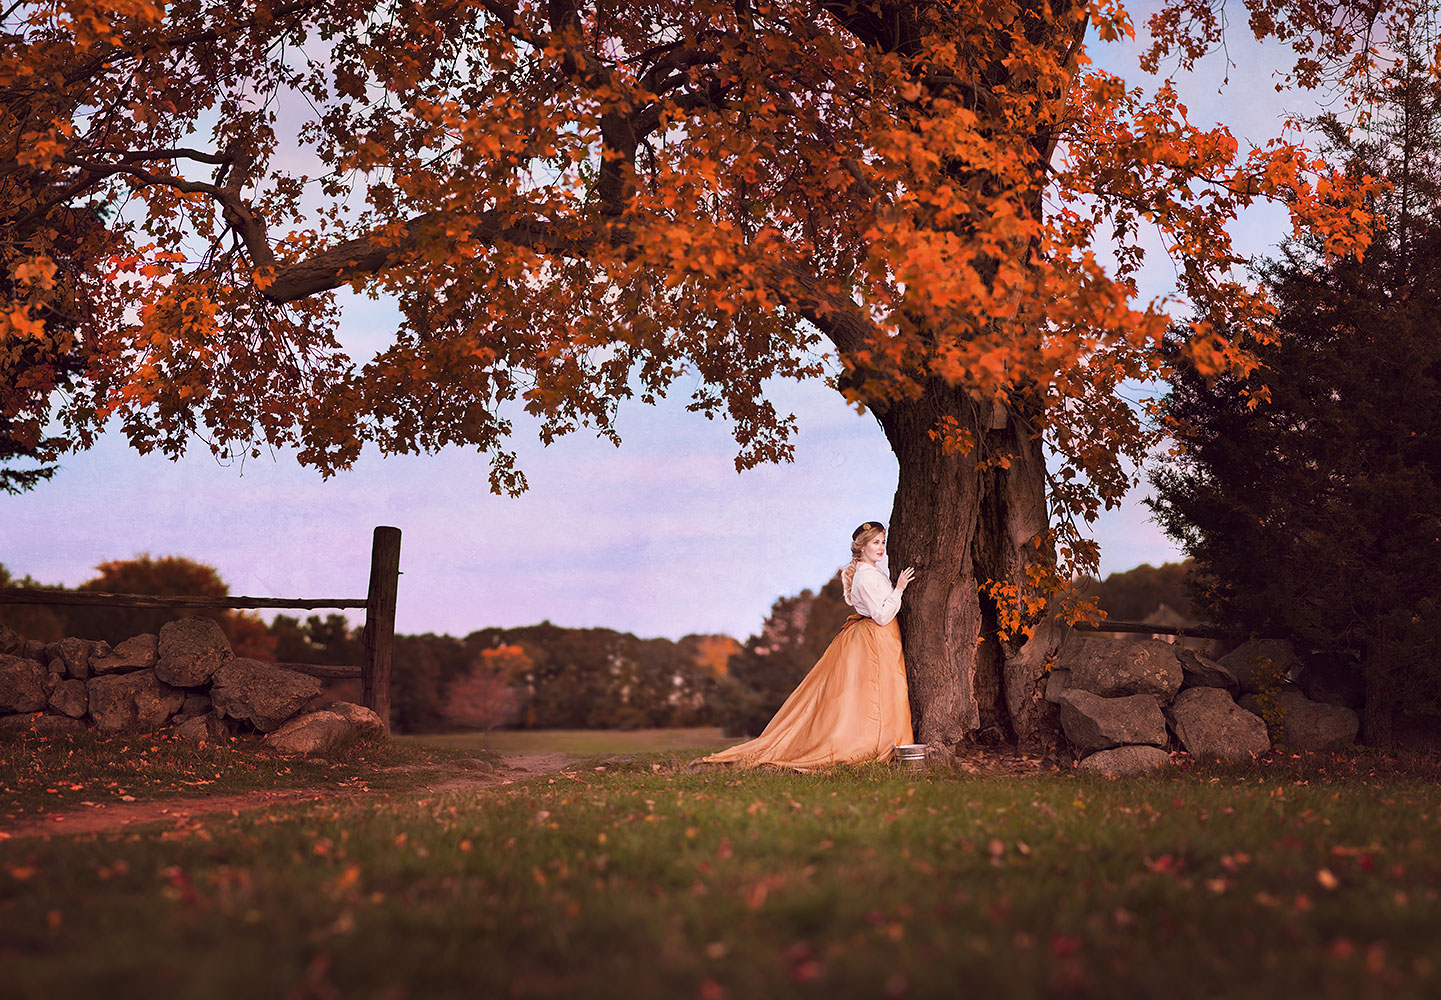
For example, when you look at it, what do you see? What do you think about? Do you see a simple story of a girl, cradling something precious to her? Or do you see a young witch or magician, learning how to create light for the first time? With art, the story will always be different for each viewer. Their unique life story fills in the blanks where words would normally convey the tale.
What do I see in this image? In all my images?
I see much more than the fairytales portrayed in each of my pieces. Rather, underlying all that, I see the story of the image’s creation. The dingy garage we shot in, the dress I spent weeks sewing together, and the metallic paint my sister and I giggled over as we painted her body gold. I see the work and the love that went into each individual piece, slowly bringing it to life with each stitch of thread and each click of the shutter. And I want you to see it too, at least for today, when I share the transformation of how Magic’s Origin grew from just a thought to a whimsical reality.

It begins with the concept. The idea. Sometimes that idea is inspired by a quote, sometimes by a personal experience. In the case with Magic’s Origin, it was inspired by an answer to a prayer. The full story of exactly how I was inspired can be read HERE.
Step 2: Research – Once an idea has formed, I turn to Pinterest to research everything from costuming and makeup, to lighting and locations. Each idea I have has its own Pinterest board where I can collect the small inspirations and ideas I find as work on the piece progresses.
Step 3: Illustration – With an idea for the costuming and location, I then do a rough sketch in my art journal. This helps me to visualize what it is I’m trying to create. (Interesting side note: sometimes I actually skip Step 2, depending on how clearly I can see in my mind what I’m trying to create).

Step 4: Thinning and Fleshing Out – After sketching everything out, I go back to Pinterest. Looking through my board, I weed out what no longer fits my vision and begin to create a more solidified idea for my new image. After this stage, I know exactly how I want the piece to look. This is tremendously helpful when it comes time to take the image because I know exactly what I want. I’m not (figuratively and literally) taking a shot in the dark and just hoping it all turns out how I wanted.

Step 5: Location Scouting – With the solidified image in my head, it is then (most of the time) pretty easy to find where I want the image to be taken. Sometimes it’s simple and it takes place in a studio, meaning anywhere that I can set up my backdrop and lights. Sometimes the scenery I need is a bit more specific, requiring a few scouting adventures to find exactly where my scene actually exists. This can at times take several weeks before I find what I need, but it’s always worth the extra effort to find that perfect spot (like in Scarlet and Gold, which took about a month to find THIS location).
Step 6: Prop & Costume Creation – Steps 5 and 6 generally happen at the same time, especially if, like with Scarlet and Gold, I need a very specific location that can take weeks to track down. So far, all of my costumes have been created with repurposed materials (including wedding dresses, duvet covers, bed sheets, and leftover fabric from other craft projects).
Step 7: Set up – Once everything is created, finalized, and scheduled, I gather my model, costume, and any necessary props and lighting and set up my scene. Generally speaking, it takes about an hour to do the entire shoot. Sometimes it seems excessive when I think of all those weeks of preparation and hours of creation all boiling down to one solitary hour in front of the camera. But the thrill I get from that, when I finally see what used to be a hazy image in my mind finally brought to life in front of my eyes, is exhilarating and absolutely enchanting.
Step 8: Edit – The final step is the editing. First I comb through everything I shot, deleting the images that don’t fit exactly with the story I have in mind. Eventually I narrow it down to one final image, which I then devote several hours in photoshop to. I do everything from fixing minor flaws in the image (like that troublesome pimple right in the middle of my model’s forehead), to adjusting the lighting and the color balance. I find that these simple fixes, with a touch of light painting here and there, combine to create an image that belongs in a whimsical and enchanting storybook.
After all that, I save my image and I simply stare at the piece for a few minutes, appreciating all the hard work that went into creating that one solitary image. I love photography and have for the past ten years. I don’t anticipate this is something that will change any time soon. However, I have found that, despite how much photography sets my soul on fire, I have a passion for the entire process. While it’s certainly not a quick process, I love every step of the journey. To me, it feels as if each step of the journey brings with it a new source of joy, like a small, bubbling spring of excitement, bringing me closer and closer to my vision each step of the way.

Leave A Comment